

Whether you are a gardener or simply take pride in your yard, you may have noticed a few unwanted pests. A commonly found garden pest is adorable, yet often destructive: the mole. Moles are known as pests because of the intricate tunnel systems that they build throughout your yard.
But, many gardeners realize the important impact moles play on the environment and don’t want to hurt them, they just want the critters gone.
How do you get rid of moles WITHOUT hurting them? 5 Ways to remove moles from your yard without causing harm are:
- Live traps – DIY or purchased
- Flood Mole Tunnels To Trap By Hand
- Use Natural Plants And Repellents
- Make A Caster Oil Spray
- Use Cat Litter
- Reduce The Watering Frequency Of Your Lawn
- Purchase Vibrating Snakes
- Manufactured Granule Repellents
- Consult a Professional
If you have noticed molehills popping up in your yard, and you’re not a fan, you’re not alone. But these cute critters are not trying to harm your yard; they are simply searching for food to survive. Though the desire to remove them is understandable, there are several humane ways that you can do so that will keep the moles safe and keep you happy.
Safely Removing Moles from Your Yard
Though moles can be slightly annoying and can cause damage to your yard, you do not want to harm them when removing them from your yard. After all, they are just hungry little critters searching for an insect snack.
Unfortunately, removing them humanely can take some work compared to less humane methods. Luckily, there are some ways to safely remove moles from your yard and help deter them from coming back again.
Option 1 – Use Live Traps to Capture Moles
When researching mole traps, you will find a lot of less humane options out there. Though these creatures can be challenging to deal with, they do not deserve to be brutally killed. Luckily, in recent years, there have been more and more humane traps designed and released.
You can find several humane trapping options highlighted on our resources page, all offering a similar technique and keeping the moles alive when captured. There are also several do it yourself techniques out there that can effectively trap the moles safely. We will further discuss the methods available to you and how you can catch then relocate the moles.
When to Begin Trapping Moles
Essentially, you can begin the mole control process during any time of the year.
But, many find that moles are most noticeable between October and April, which tends to be when they are actively digging new tunnels. By doing so at this time, you can catch the moles that are most active and are actively tunneling. This is when most experts recommend you begin mole trapping and it is most effective.
During the winter and spring, more males are usually captured. To reduce the number of moles effectively, you might want to trap in April and May, as this is when females are pregnant. Removing more females that are bred, lowers the chances of your mole population being repopulated.
- Oct – April: Moles are the most active. Easier to trap males
- April – May: Female Moles are pregnant and most easily trapped

Photo Credit: Flickr Hillbraith
Purchase a Plastic Mole Tube Trap
Plastic mole tube traps are readily available; you will often see them marketed as humane mole traps. These consist of two short plastic tubes that fit together. They will range in sizes depending on the brand.
The trap features a metal swing door at the ends that allow the trap to be entered from either end. However, the hinges allow it only to be entered in one direction. This essentially allows the mole to enter the trap but not to exit.
How To Use Tube Traps To Trap Moles
Step 1 – Start by identifying suitable mole runs to place the tube trap in. These are the main tunnels that the moles have been using throughout your yard.
Identify these potential runs and then push a probe in the ground slowly and firmly. If you feel a give as the probe enters the run, you will know you are in the right place.
Step 2 – Once you have identified a suitable run, you will want to try to determine its direction and aim for a straight run. You should then rub soil into your hands to try to mask any human scent that could deter moles from entering.
Fit the parts of the tub trap together and place a few earthworms inside; these worms should be cut in half and can help attract the moles.
Step 3 – Now that you have a run in mind and your trap is ready, you will use a small trowel or knife to dig a hole the size of the trap into the top of the run. Remove any loose soil or other debris that you may uncover but try not to overly disturb the tunnel.
If you see smooth sides and the floor of the tunnel appears smooth, it is probably still in use. You will then smooth any spots down further and place the trap inside.
Step 4 – Align the trap with the bore of the tunnel, making sure to place it in the hole with the lower side of the trap pressed lightly into the floor of the tunnel. You should try to eliminate any light from entering the trap by using grass, soil, or other vegetation.
You do not want to overly cover the trap and risk the material blocking either of the doors.
Step 5 – Check your trap regularly – around every four hours. When you catch a mole, you can either relocate it using the trap or place it into a bucket with a lid to use for relocation purposes. You can keep the mole inside of a bucket with adequate food and supplies for longer, but they will still need to be released quickly.
Each time you empty and reset the trap; you will want to replenish the earthworms inside. You should continue resetting the trap until you notice mole activity has decreased or go some time without catching a new mole.
Problems with Tube Traps
Though tube traps are considered a humane option when it comes to trapping and relocating moles, they do have some problems that you need to keep in mind. Since these tubes are small in size, there is no room to provide adequate bedding.
Moles tend to have a high metabolic rate and can become very cold without proper bedding, which makes checking the trap routinely critical.
Plus,
The door continues to allow entering into the trap and just prevents exiting, additional moles can enter on top of each other. This is a very small area for two moles, especially when the species tend not to interact regularly. This can lead to fighting, which can cause injury or even death to one of the moles.
If you continue to monitor the traps and check for moles regularly, you should avoid any negative side effects of the traps. You should never trap during cold months, and it is ideal during the spring when moles tend to be more active. Once you have trapped several moles, you should flatten molehills to better detect additional movement. If you see movement, later on, you should reset your traps and start again.
Create a Trap Using Items You Own
If you do not have the funds to purchase a mole trap or simply want to try a different method, you can easily make one from materials you own. Many have created effective traps using buckets from home and following the same essential steps listed above. To create a bucket trap at home you will follow these steps:
- Find a mole tunnel that has already been dug out and open it up.
- Dig far enough into the ground that you can fit a bucket and its opening level with the bottom of the mole tunnel you chose.
- Fit the bucket inside of the hole and then place a piece of plywood over the top of the tunnel. You do not want daylight to shine through around the bucket, which can deter the moles from entering.
- Add a layer of dirt on top of the plywood.
Once you have completed the steps above, you will want to bait the trap to guarantee that moles are attracted to it. You can do this by adding worms or grubs inside of the trap, and the mole will smell these delicious insects. Essentially, the mole will enter the bucket to get the insects and then be unable to get out of the bucket.
As with the live tube traps, you will want to check the bucket every four hours to see if you have captured any moles. You can cover the bucket and relocate the mole effectively if you have captured one. If you remove a mole, you will want to reset the trap and place it back into the hole.
Option 2. Flood the Mole Tunnels and Trap By Hand
This is the most hands-on way to remove the moles from your yard but can be tricky if you are not used to handling wildlife. This method is only recommended for those who have handled wildlife before, those who have smaller yards, and is only possible if you have more than one person helping.
Of course, it will also give you lots of exercise and possibly some crazy running around the yard if your reflexes aren’t fast enough.
Don’t forget!
Each individual present should be prepared with long pants, long sleeves, and appropriate gloves.
To flood the mole tunnels in your yard effectively, you should:
- Locate the end of one of the mole tunnels
- Open the tunnel and insert the end of a water hose
- Slowly begin filling the mole tunnel system with water from the hose
- Watch the remainder of the system, looking for movement or new tunnels that the moles may be making
- When you see new activity, stop the mole by snatching it with your gloved hand. You may want to use a shovel or other tool to place in front of the mole to stop it from further tunneling
- Place the captured mole into a large bucket and relocate it appropriately
Relocating Moles Effectively
The biggest problem with catching moles alive and humanely is that you must find somewhere to relocate them.
You should contact your local Fish and Wildlife to get additional help with relocation and finding a quality place. However, it can be challenging to find an area where you can relocate the moles safely, and this is something you want to look into before trapping.
Once you have a location in mind, you may want to approach the relocation with a soft release approach. When you do a soft approach relocation, you will include measures that help the moles adapt to their new surroundings. This is particularly important when it comes to moles, as they tend to not take well to relocation.
Before you release your moles, prepare the area with a nest chamber that has adequate bedding. You should also provide enough food for a few days until they can begin the tunneling process. You may want to revisit the location in a few days to ensure they have begun tunneling and look for signs of molehills.
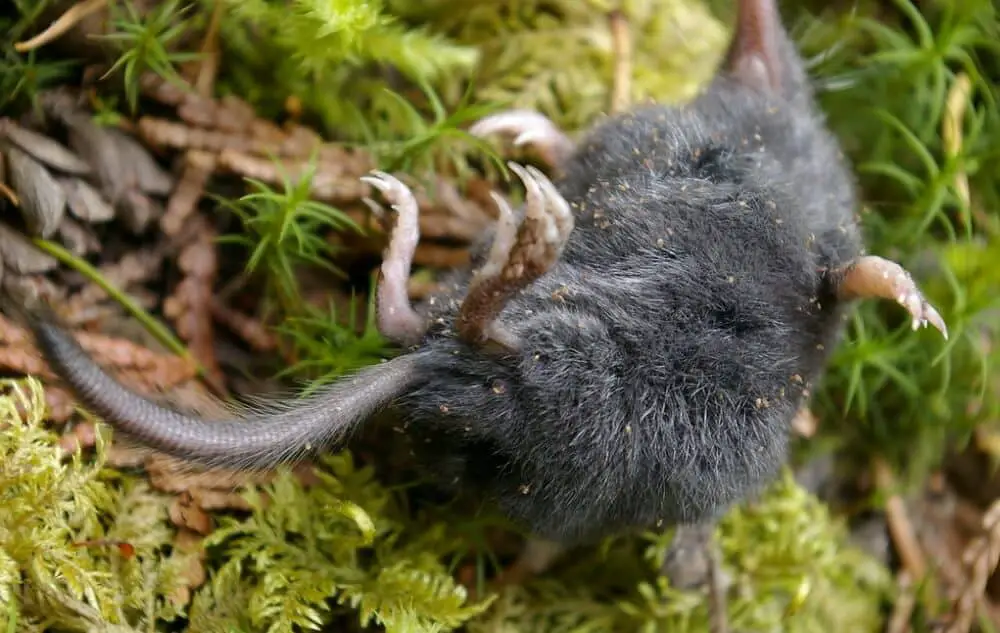
Photo Credit: Flickr Tim Gage
Precautions to Take
Of course, you should not simply jump into trapping live moles and should be certain that you take precautions before starting. Though moles are relatively harmless, they can bite or scratch when they feel fear, which is to be expected.
Wear protective gloves, long pants, and long sleeves to reduce the chances of injuries.
Make certain that you are up to date on your tetanus immunization as this can be carried by moles. Wash your hands well while you are trapping the moles and anytime you deal with the trap.
Option 3 – Naturally Repel Moles Through Plants
One way to help lower the number of moles in your yard is by using natural repellants. This usually takes longer to be effective and may not eliminate all of the moles, it can be a great way to lower the population numbers. But natural repellents require consistent use.
And-
Natural deterrents used in addition to proper trapping, can get rid of the mole population and avoid them coming back.
Plant Daffodils and Marigolds
Moles hate the smell of daffodils and marigolds, but these beautiful flowers make a great addition to any landscaping or yard. Plant daffodils and marigolds in specific areas that you absolutely do not want moles to inhabit.
They may just move to another area of your yard, this can keep them out of your vegetation, gardens, landscaping, etc.
Option 4 – Create a Castor Oil Spray
Moles do not like the smell of castor oil. Use this oil to make your own mole repellant. Mix six ounces of castor oil with two tablespoons of soap to create a concentrate that moles hate.
Use this concentrate directly on your garden using a spray bottle or use it when you water your plants. Mix one ounce of your concentrate to every gallon of water.
The smell of this castor oil will only remain for around a day, which means you have to reapply the concentrate regularly. Like planting the flowers listed, this will not keep moles out of your yard entirely. However, it can keep the moles out of your garden or areas where you simply do not want them.
Option 5 – Put Cat Litter Inside the Mole Holes
If there are certain areas that you do not want the moles, but you have noticed their molehills popping up here, you can add cat litter to deter them.
Dump cat litter into the holes. Cats are one of the moles’ biggest threats and they will avoid the area entirely. This is a cheap and quick way to keep them out of certain areas of your yard.
Option 6 – Reduce the Water Content in Your Lawn
The reason moles dig into your yard is that they need to find insects and worms to survive. Yards that are watered regularly tend to have more earthworms present and are attractive to moles.
By reducing the frequency of your watering, you can reduce the levels of worms and other bugs in your soil. But, be aware that earthworms are good for your soil so consider what kind of a balance you want to maintain.
Do your best to reduce the amount of moisture in your yard and garden when you notice mole activity. You should only put enough water into your garden to keep your plants alive, doing so only every few days instead of daily.
Purchase Natural Mole Repellants
If your yard is badly infested with moles, you may need a stronger repellant than those previously mentioned. There are several humane deterrents out there that help keep moles from inhabiting your yard.
These may not run them away entirely, but in addition to trapping, these repellents can make a big difference. You can find recommended natural mole repellents here.
Option 7 – Purchase Vibrating Stakes for Your Garden and Lawn
Another popular humane ways to deter moles from your yard is using sonic or vibrating repellants. These are usually stakes that you can place into the ground that emit sonic vibrations. These vibes will scare off moles and other rodents.
This is a more pricy solution, especially for those with larger yards.
There are both solar and battery-operated versions of these vibrating stakes out there.
Simply put them into the ground and let the stakes do the work for you. The frequencies emmitted are undetectable to humans (there is always at least one exception) and should be no nuisance to you. However, they should work well on moles and other unwanted rodents.
Option 8 – Add Granulated Repellents
Another option is to granulated repellents. These usually contain several natural ingredients that help deter moles from entering your lawn or garden.
Be aware!
There are granules with natural repellents and granules with poison that contaminate your soil. Check out our resources page for more information.
Some common repellents like this contain castor oil, citronella oil, garlic, and similar ingredients. You will want to read the instructions on the package fully before adding any granulated repellents to your yard.
Make sure you don’t over-apply them are using the correct amounts.
Use Liquid Repellents
Similar to granulated repellents, there are also liquid repellents sold on the market today. These usually have a similar makeup of the granulated options and use some of the same ingredients. These premade formulas take less time and work than creating your own.
Just like the granulated options, you will want to follow the instructions fully. You will usually spray these repellents on your lawn, vegetation, flower gardens, etc. and the moles will naturally be repelled from entering these areas.
But, I have some doubts as to their effectiveness. The liquid repellents are usually sprayed on plants and the surface area- an area that moles seldom visit. The most effective way to get rid of moles or repel them is to place repellents inside the tunnels where moles will encounter the repellent.
Option 9 – Consult a Professional
If you have tried several of the methods above to no avail, you may want to consult an expert in the area. This is a great choice if you do not have the time to put towards removing the moles or do not want to purchase a lot of materials for the job. There should be wildlife professionals in your area that can help you with the problem effectively.
The biggest issue you will run into when doing this is finding a professional who is dedicated to humane practices. You want to guarantee that when you hire someone, they work to remove the moles safely, some services they should offer are:
- Offering a full inspection of your property and helping you determine the size of the problem
- Use high-quality methods that are humane to the moles present
- Do both prevention and treatment at the same time, so removed moles do not return
- Try to find someone who offers a guarantee for their services
Ensure Your Pests are Actually Moles
The first step to removing these pests is ensuring that you actually have moles in your yard.
Other pests show similar signs to moles, so make sure you are dealing with moles before you start taking steps to remove them. This may seem like an easy process, except that moles rarely come above ground to be visually verified.
Physical Appearance of the Mole
People rarely see moles as they tend to remain underground for the bulk majority of their lives. If you do see the trouble animal, it can help you to identify which critter is in your yard as they are pretty recognizable. Moles have smaller, beady eyes and ears that are barely visible.
They have narrow physiques that are lengthy and reminiscent of a cylinder. They have a smooth coat and are usually black, gray, or a darker brown shade. You will very rarely see them, and even more rarely will you see them in groups.
Moles vs. Voles: What’s the Difference?
Moles and voles are often mistaken for each other. Voles are seen above ground more often. Check out this article for more information on how to identify a mole versus a vole problem, even without seeing the pest.
They need different approaches for removal. Some basics you can look for when trying to decide which pests you have are:
- Voles look like mice, with identifiable eyes and ears, a small nose and no snout
- Moles are grey or black, and voles are brown in color
- Moles mainly eat insects; voles will eat feed on fruits, flowers, grasses, and other plants in your yard
- Moles remain solitary; voles tend to live in groups
- Voles can cause problems on your land by feeding on vegetation, moles mainly only damage property
Clear Signs of Moles in Your Yard
If you have not seen these pesky creatures but are fairly certain that you do not have voles, there are a few more signs that point to you having a mole problem. Identifying these signs can help you be certain you are treating your lawn for the correct pests. Some things you should look for are:
Telltale Mole Hills or Mounds
You have probably heard the saying, do not make a mountain out of a molehill. However, these mounds popping up around your yard may seem like mountains and may signify you have a mole problem. These are heaps of dirt on your lawn that signify that a mole has been forcing soil up from underground.
These heaps are noticeable but probably do not have any openings to the ground. These mounds are caused by moles rooting around for sustenance, usually in the form of earthworms.
Location of the Damage
You can also tell more about which pests you are experiencing from the location of the damage and when it appears. Often, moles focus on the upper portions of the lawn in the spring and autumn months. They tend to be more active when the soil is wetter, such as during a storm or following a big rainfall.
It is doubtful that you will see them dig around during the daytime hours, but they tend to busiest in the mornings. They tend to be more active overnight or in the earlier hours. If you notice an increase in dirt hills after a rain, especially during spring months, you probably have a mole problem.
Damage with Plants
One of the main reasons that homeowners want to remove moles from their yards is because of the damage that they do to the plants there. Since they diligently dig for worms and other insects, they can be very destructive to vegetable crops and flowers.
Moles usually do not eat a lot of the plants, but their digging habits can ruin them on accident. If you notice root damage or seedling appear damaged, the signs are pointing to moles in your yard.
Related Articles
4 Reasons Rabbits Keep Coming Back to Your Yard
9 Effective Ways To Keep Rabbits Out Of Your Yard And Garden